Triggers allows you to perform automated actions like triggering an email or updating an attribute based on a specific criteria. Opportunities App allows you to set triggers on
- Event based
- Time based
- Activity based.
Steps to Set Time Based Triggers in Opportunities App
- Log in and access Opportunities App from the universal navigation menu bar
- Click on More(...) icon → Settings located at the app header bar.

- Click on Opportunities drop down from left navigation panel.
- Select Time Based under the Triggers drop down. Click on Create.

- You can view the create page where you need to define the following:
- Name: Name of the time based trigger.
- Enabled: The trigger created can be toggled on or off to enable or disable it.
- Execution Frequency: The frequency of execution can be set as One-Time or Recurring.
- Run On: You can pick a date and time for the time based trigger to occur.
- Define the criteria which is the space where the condition for trigger can be defined by selecting attributes and its equivalent values. This example illustrates the criteria and actions as shown below:
{
Set 1
{
Group 1
{
Sales Stage = Needs Analysis
}
}
}
- Under the Action session you can define the automatic action to be triggered for the above created criteria.

- Here, we can define three types of actions:
- Send Email - An email will be triggered based on the criteria created.

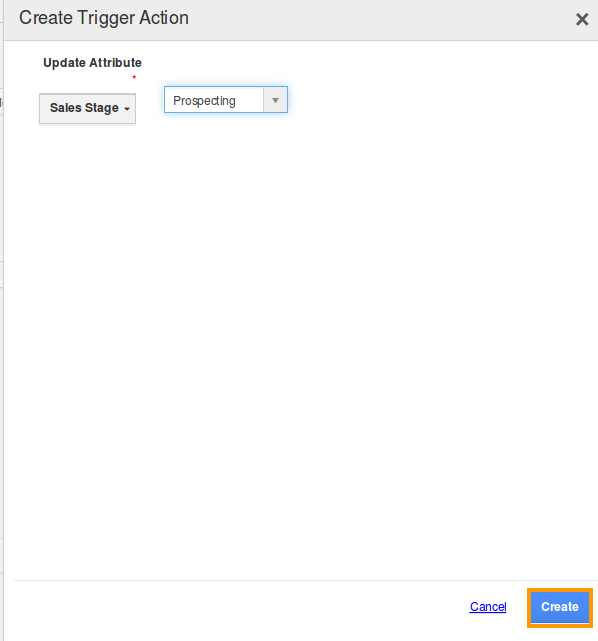
- Update Attribute - This action updates the attribute value based on the criteria created.

- Update Associated Object Attributes - This action updates the attribute values of the associated attributes.

- Send Email - An email will be triggered based on the criteria created.
- After creating action, finally click on “Create” button at the bottom, to complete. Thus, the time based trigger will be successfully created.

- For instance: A recurring trigger is created which is set to run on every Monday, where a mail is triggered to the employee when opportunities are created via Needs Analysis.


Was this article helpful?
That’s Great!
Thank you for your feedback
Sorry! We couldn't be helpful
Thank you for your feedback
Feedback sent
We appreciate your effort and will try to fix the article